Article: 5 Facts About Creating the K/DA Costumes
5 Facts About Creating the K/DA Costumes
Behind the Seams · K/DA Diaries
Chrome, Organza & 600 Hours: K/DA Behind the Scenes
So many interesting things happened behind the scenes of creating K/DA that one announcement wasn't enough. The costumes are on display at Boba Bear — but the story of how they got there lives on our workshop table: reference prints, mirror-bright plastic, heat-sealed ribbon, and a lot of quiet problem-solving.
This is that story — photo by photo, problem by problem.

Where every costume begins: prints, pens, and arguments about details
Scene 01 · The Table
Every costume starts as a stack of prints
Before a single piece of plastic is cut, the K/DA builds lived on our worktable as printed reference sheets — details circled in pen, construction questions argued over coffee. When a design exists only on screen, printing it is how it becomes real enough to plan against.
“For Evelynn and Kai'Sa, we only had reference images from a single angle — so we had to come up with some of the costume details ourselves.”
That line is the quiet reality of translating art into objects. Game and music-video art shows what the camera saw — and nothing else. A real costume has a back, an underside, an inside. So we extrapolated: missing angles reconstructed from symmetry, construction logic and how similar garments behave, with every invented detail drawn in the same visual language until the gaps stopped existing.
This stage looks calm in photos. It isn't. It's where the expensive mistakes get prevented — which piece is rigid, which one flows, what has to move, what has to shine — and where a costume's invisible half gets designed. The best compliment that work can receive is that nobody at the exhibition can tell which details the original artists drew, and which ones we filled in ourselves.
Scene 02 · The Chrome Problem
Mirror finish, meet reality
K/DA stage costumes demand chrome — that liquid-metal, mirror-bright look that flat paint can never honestly deliver. And chrome-finish plastic is exactly as difficult as it sounds: every fingerprint shows, every forming mistake is permanent, and the finish punishes improvisation.
We had a plan for sculpting the bodice pieces with those folded, faceted contours — but the material had other ideas. And this is where the story gets good.

Chrome-finish plastic — beautiful, unforgiving, solved
Special thanks
A special thanks to @kanorika_studio for the idea that helped us find a solution for working with chrome-finish plastic.
This is why the maker community matters. One conversation with people who've fought the same materials can save weeks — and in this case, it's their idea reflecting in every mirror-bright piece on display.
Scene 03 · The Silver Details
Sculpted, mounted, and mirrored
Once the chrome approach was solved, the smaller metalwork followed: sculpted silver ornaments with sweeping, claw-like contours, mounted over richly colored waistbands, mirror-finished to match the bodice. Pieces like these look like jewelry in photos — in the workshop they're engineering: rigid enough to hold their shape through a whole exhibition, light enough to never fight the garment they sit on.

Sculpted silverwork, mounted and matched to the chrome
Scene 04 · The Soft Parts
Heat, organza, and wavy edges
Between the metal and the mirror work lives a completely different craft. Soft pink and purple organza ribbons — the flowing, cloud-like volume of the costumes — get their edges sealed with a handheld heat tool, one pass at a time, so they wave instead of fray.
It's slow, hypnotic work, and it's the perfect reminder that a stage costume is a conversation between materials that behave nothing alike: rigid plastic and floating transparency, engineered to live on the same body.

Every wavy edge is sealed by hand, one pass at a time
Scene 05 · The Build Comes Together
Sculpted shoulders and quiet milestones
Then the pieces start becoming a costume: fitted sleeves with wrapped cuffs, sculpted upper-arm and shoulder elements taking their shape — the dramatic silhouettes that read across a whole room. This stage is where a build stops looking like parts and starts looking like a character. It's also where the photo log gets obsessive, because every milestone means the next handover is on schedule.

Sculpted silhouettes taking shape, piece by piece
Scene 06 · The Fitting
From mannequin to human
The moment every build works toward: a person inside the costume. The fitted bodice with its chrome trim, the high metallic collar being adjusted at the neck — this is where flat measurements become movement, and where the last honest answers live. Does the collar sit? Does the bodice hold when the wearer laughs? The fitting is where the costume finally meets its purpose.

The collar sits. The bodice holds. The costume is real.
Scene 07 · The Result
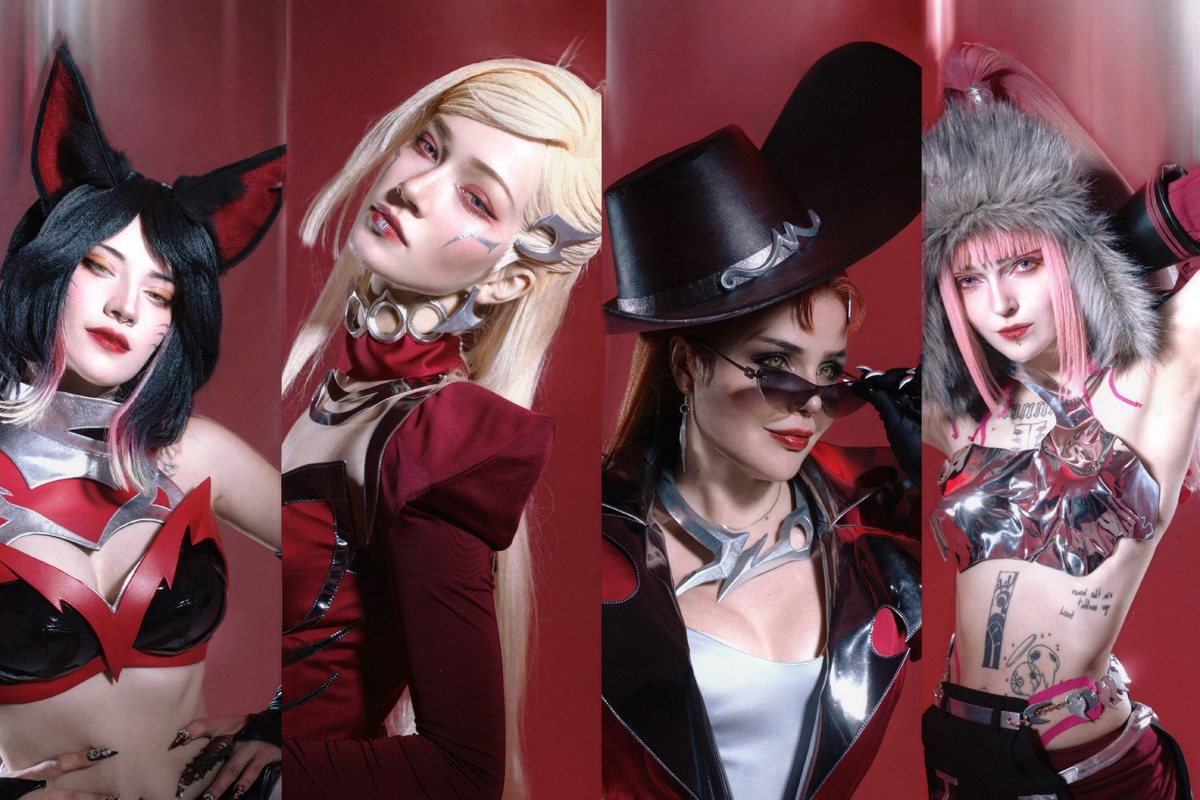
costumes ready to be looked at
And here they are — the finished costumes side by side, photographed in the studio before traveling to their exhibition home. Two characters, 600 hours, one chrome problem solved with help from a friend, two variants of a hat, and one pair of gloves that took three rebuilds to earn their place.
They were built to be exhibited — and you can see them in real life at Boba Bear, as part of their collaboration with Riot Games and the K/DA project. Go look closely. Everything above is hiding in plain sight.

600 hours, side by side
See them in real life
The K/DA costumes are waiting at Boba Bear — chrome and all.
And if your favorite character deserves the same treatment:
Visit Boba Bear Boba Bear on Instagram
